Fixing Helios 3D Loading Issues in Civil 3D
Problem Description
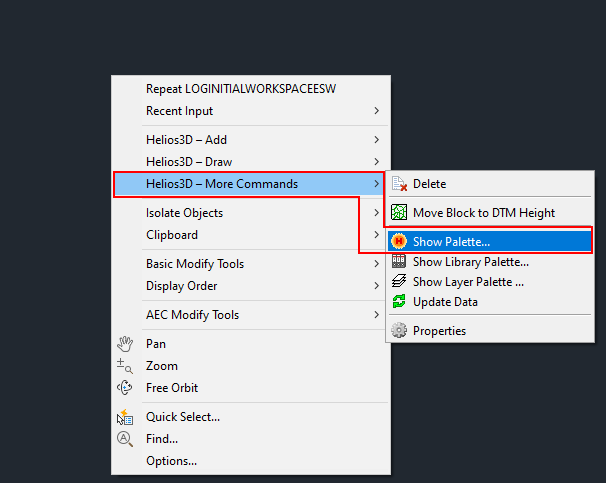
Autodesk Civil 3D launches from Helios 3D but does not display the palette. Attempting to open the palette through the context menu is also unsuccessful, as no Helios 3D commands are available. The commands shown in the following image should appear when no CAD object is selected.
Solutions
Autodesk Civil 3D Version
It’s essential to ensure that the correct version of Autodesk Civil 3D is being used with Helios 3D. Up to the 2020 release, Helios 3D was compatible with only the matching Autodesk Civil 3D version. For example, Helios 2020 requires Autodesk Civil 3D 2020.
Starting with Helios 3D 2021, the major release indicates the latest compatible Autodesk Civil 3D version, though previous versions back to Autodesk Civil 3D 2020 are still supported. This means that Helios 3D 2021 can be used with either Autodesk Civil 3D 2020 or 2021, with additional Autodesk Civil 3D versions being supported in later Helios 3D releases.
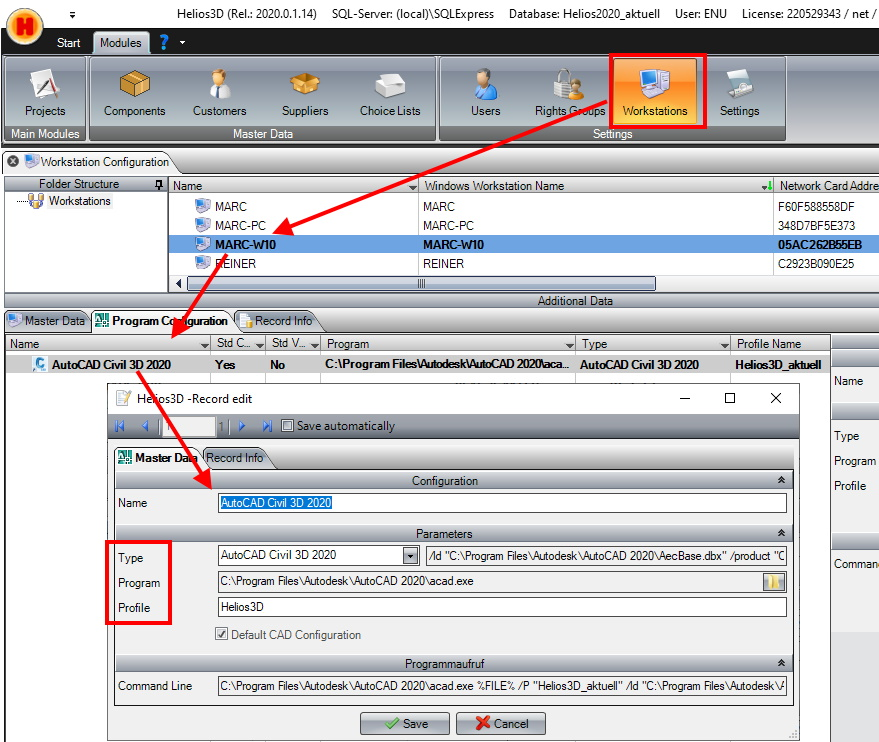
If an incorrect Autodesk Civil 3D version is launched, it can cause configuration issues on your workstation. Ensure the settings reflect the correct Autodesk Civil 3D version for the chosen acad.exe, along with the necessary profile name. The example configuration in the following image demonstrates the setup for Autodesk Civil 3D 2020.
Resolve profile-related issues
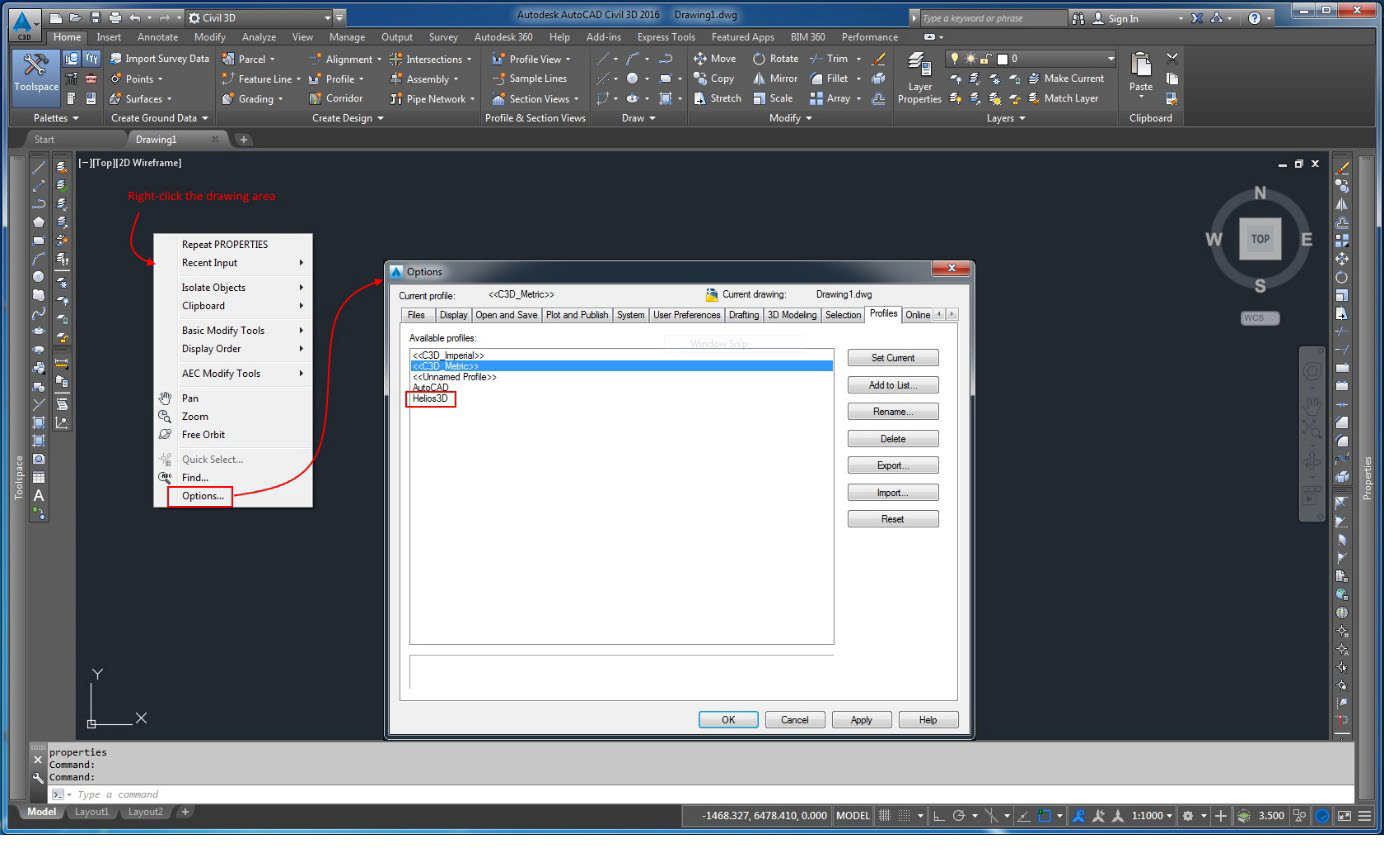
- Open Autodek Civil 3D independently, without launching Helios 3D.
- Locate and remove the profile named “Helios3D” (this is the default name unless it was changed manually).
The image below illustrates the steps to delete the profile.
After removing the profile, the simplest solution is to close Autodesk Civil 3D and relaunch it through Helios 3D. This should automatically recreate the “Helios3D” profile as a copy of the <<C3D_Metric>> profile.
If the profile does not regenerate automatically, you can manually create it using the instructions provided in the following section.
Network Installations
Only network installations might need to allow Civil 3D loading our DLL files over the network. For that you need to exchange or edit the Acad.exe.Config file. We have a prepared version of the file in our Helios 3D installation directory (e.g., C:\Helios3D\Acad.exe.Config).
The target file to change/replace is found in the Civil installation folder, which is usually:
“C:\Program Files\Autodesk\AutoCAD 202X\Acad.exe.Config”
We recommend to rename the original and then copy our example file from the Helios folder to the AutoCAD folder with the correct version number.
The important line is the red one below to be added to the first section of the document:
<runtime>
<loadFromRemoteSources enabled=“true“/>
…
</runtime>
Creating a Civil Profile manually
These settings are just required if all above options fail.
- Enter the command “options” to the command line. (If you use another Civil 3D language version than English, please try “_options” or the corresponding translation in your language.)
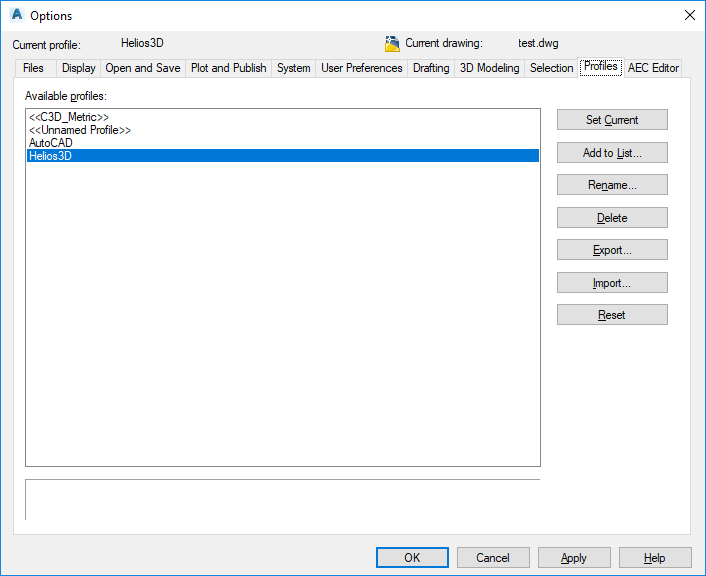
- Select the “Profiles” tab (further on the right) of the “Options” dialog. The following figure shows an already created profile “Helios3D”.
If you want to use a profile which is already existing you can use it by clicking “Set Current” and close this dialog.
- Go to profile “<<C3D_Metric>>” and make it <Current> .
- (only if an already existing profile “Helios3D” should be replaced)
Select the profile “Helios3D” and press .
- Copy the profile “<<C3D_Metric>>” by using the <In list…> button.
Please enter the profile name “Helios3D” in the appearing dialog and close it by pressing <Proceed & Close>.
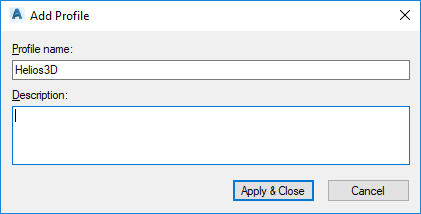
- Go to the new profile and press <Current> . Afterwards you can close the dialog with <OK>.
After setting up the profile you can now start the Helios-Palette. Please regard that the workspace is set to Civil 3D.
A right click into the drawing opens the context menu. Under “Helios 3D – More commands” there is the command “Show palette…”. Use it to load the Helios-Palette whenever it has not been loaded automatically.
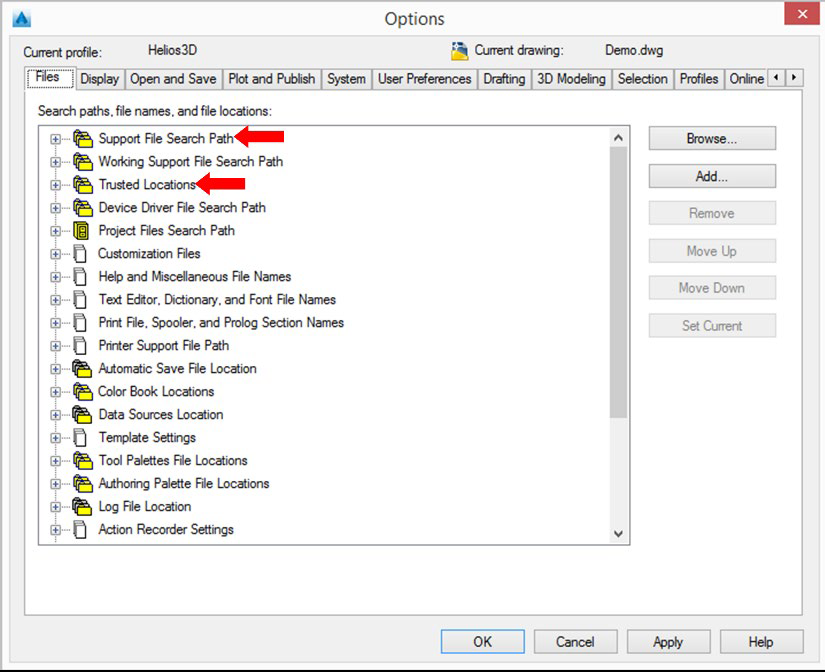
- The “Bin” directory from your Helios 3D installation path must be added as “Support File Search Path” and the program base path of Helios 3D to the trusted locations.
So, you need to open the Civil 3D options dialog and activate the profile “Helios3D”. Then navigate to the Files tab and locate the entries “Support File Search Path” and “Trusted Locations”, which are displayed below.
Here you can <Add> a new entry.
As search path please add the “Bin” directory of your installation path and move it to the top of the list!
Example: “C:\Helios3D\Bin”
As trusted path you can add the installation path of Helios 3D or a part of its root path with three dots at the end of the entry (makes all sub paths being trusted, too).
So “C:\…” makes the whole drive I being trusted, while “C:\Helios3D\…” just makes the installation directory a trusted location.